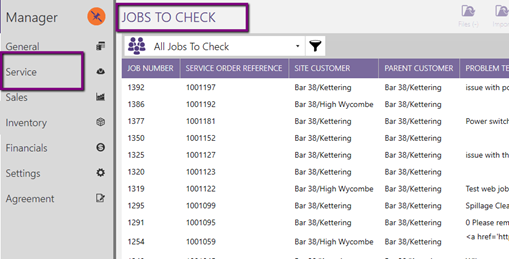
1.1. Jobs to check
The batch process starts in the job to check process. This is where the completed jobs are captured ready for checking but prior to release for invoicing.
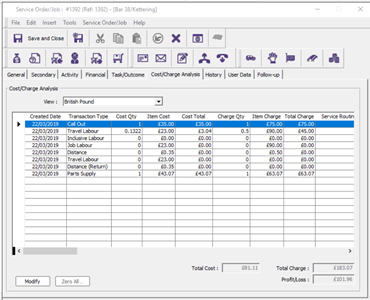
Open the job select the cost charge analysis
Amend as required
On completion of checking all required details within the job it is now ready for batch processing.
Select the financial tab
Select the charge status ‘Ready to Batch’
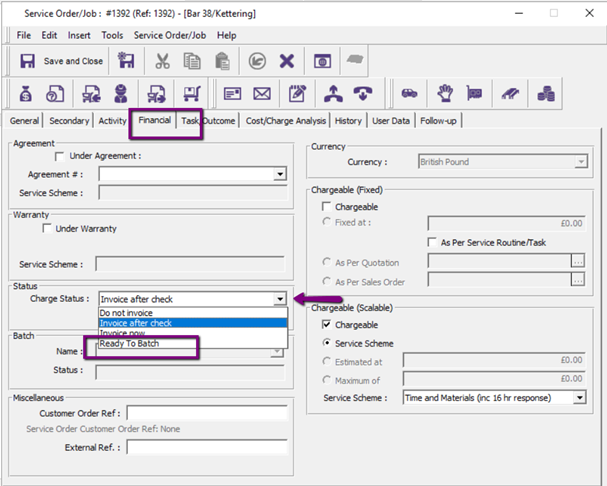
These jobs will now be stored awaiting completion of the batch.
1.2. Batch Creation
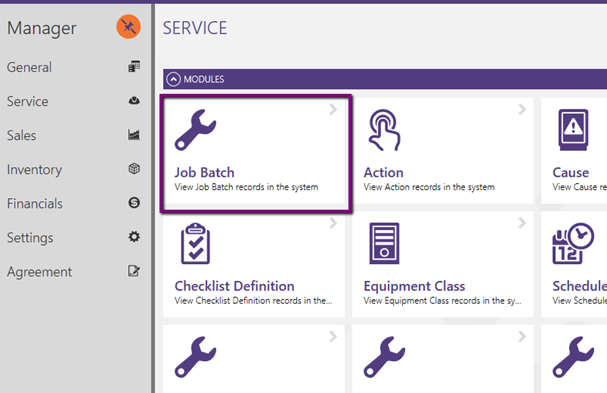
This is where the batch is created for all the stored jobs.
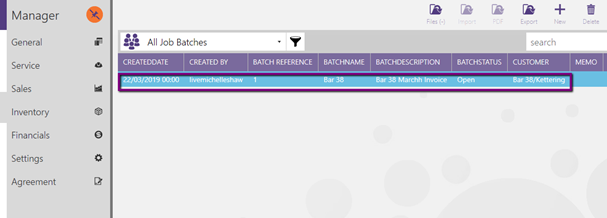
Select Job Batch
Select New
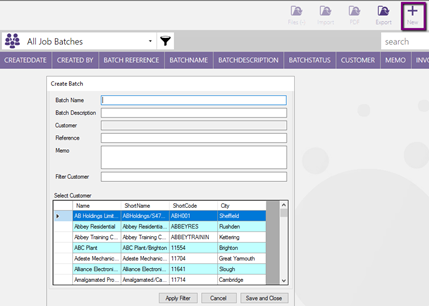
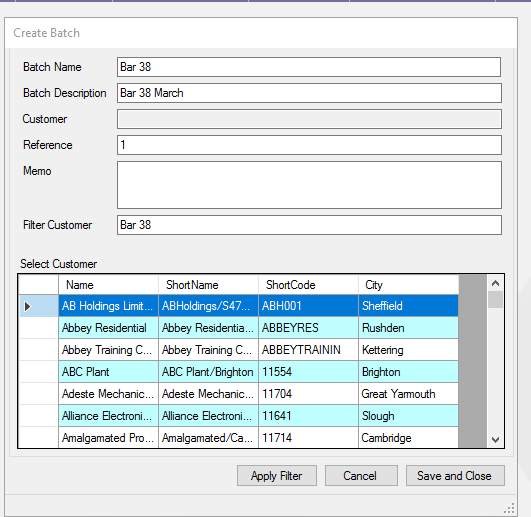
Batch Name: Free format as required
Batch Description : Free format as required
Reference: Free format as required
Filter Customer: Enter required details to enable the search for the individual customer
Select apply filter
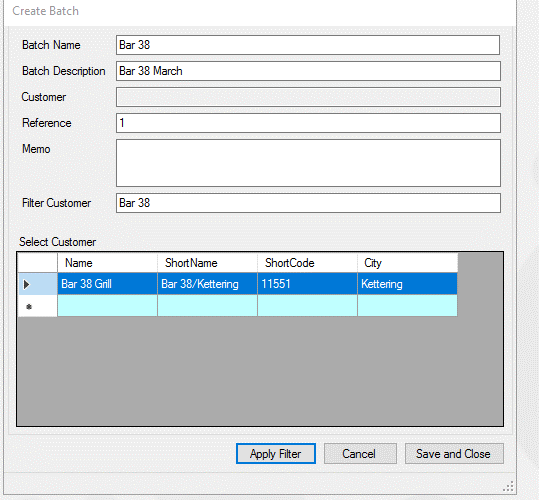
Select Save and Close
This will now move all the jobs for the selected customer into the batch
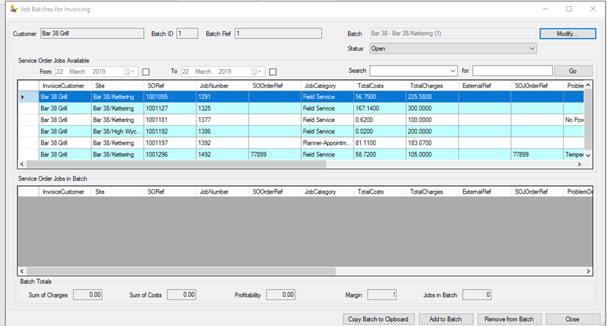
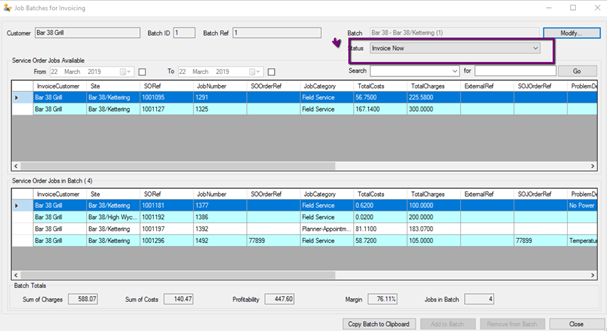
Each job can now be added or removed to the batch
There is also search features that can be utilised to assist with identification of the jobs to find them and add to the batch
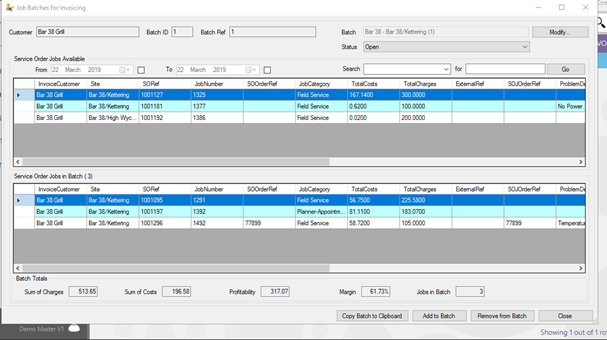
Whilst the batch status is open jobs can be added and removed as required
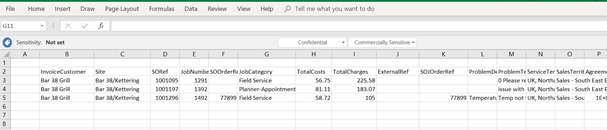
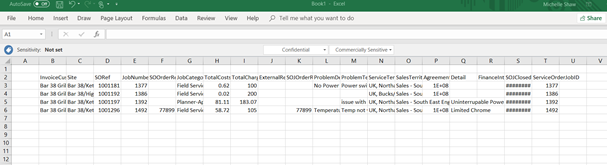
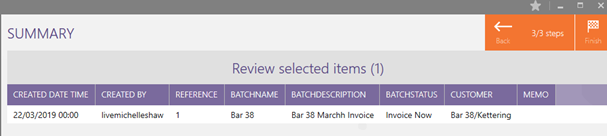
The copy batch to clip board will enable to you capture the details and copy in Excel
See example
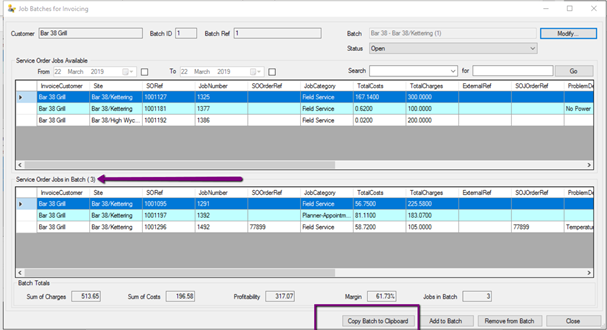
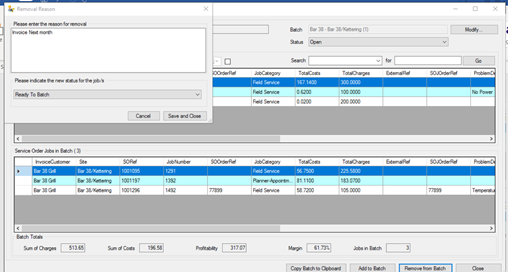
Should you select to remove items from the batch you will be prompted for a reason.
1.3. Application or Invoice Now
The batch status could be optionally set to ready ‘Ready for Application’ or alternatively just move to ‘Invoice Now’.
At this stage no further jobs can be added or removed from the batch
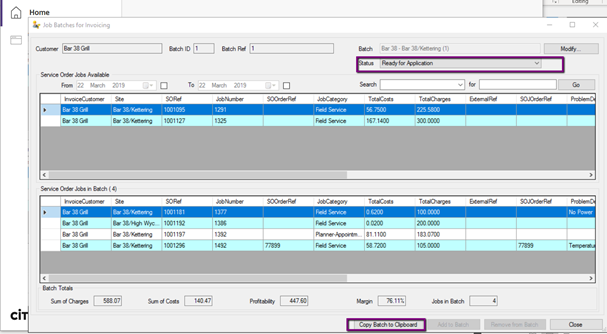
It is possible at this stage to copy into Excel as shown below
1.4. Prepare the invoice
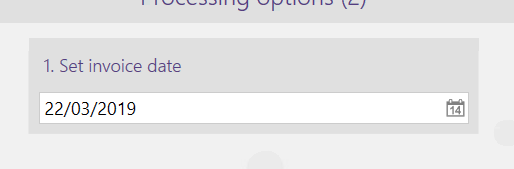
Select Finish
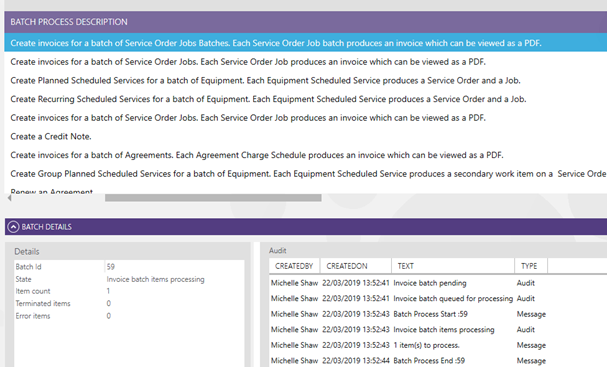
The batch will process
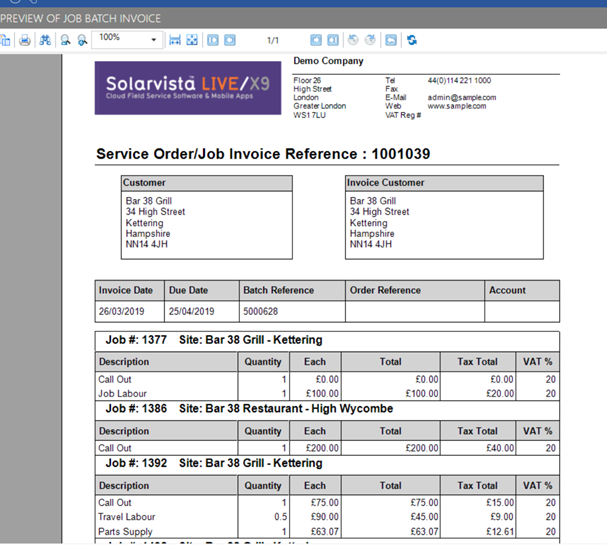
1.4.1. Print
The batch invoice is now available to print
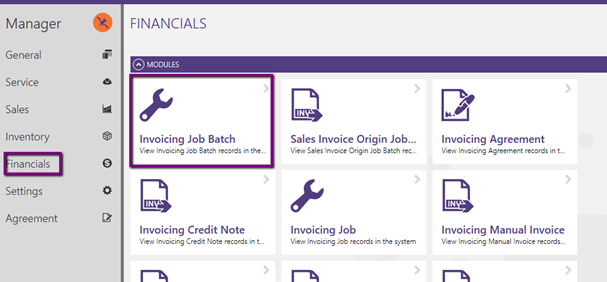
Select Financial
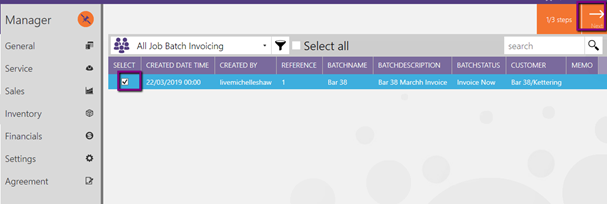
Select Sale Invoice Origin Job Batch