Associated Feature(s):
- FEA002 - Keep a customer database including contact info.
- FEA009 - Add notes to customer files.
FEA002 - Keep a customer database including contact info.
Access to the Customers view is from the X9 Manager Taskbar in Solarvista Live Explorer and then via the General TAB to display the Customers and other general icons.

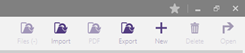
The Customers icon opens the Customers view using the default filter. At the top right hand of the screen are various option that are enabled/disable as necessary by the application.
The number of records in the view is displayed at the bottom of the screen for information.

Before adding a new customer , it is preferable to use the Search feature to check the customer does not exist. Enter some relevant information into the Search window e.g. Postcode and click the Search button.
Any records meeting this criteria will be shown in the Customers view, alternatively an empty screen will be returned.

To add a new Customer record, use the New icon on the Customer view
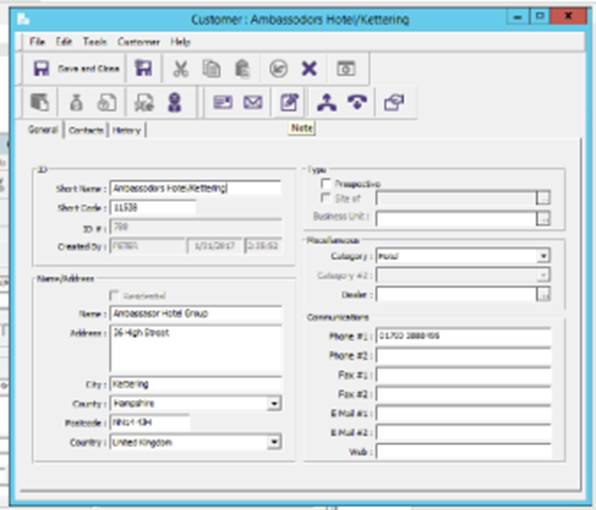
This will open an empty Customer record form to enter the customer data. Most of the information is entered as free format text, but some fields use lookups to enter predefined information for example Customer Category. These categories will need to be set up in advance of entering any customers records.
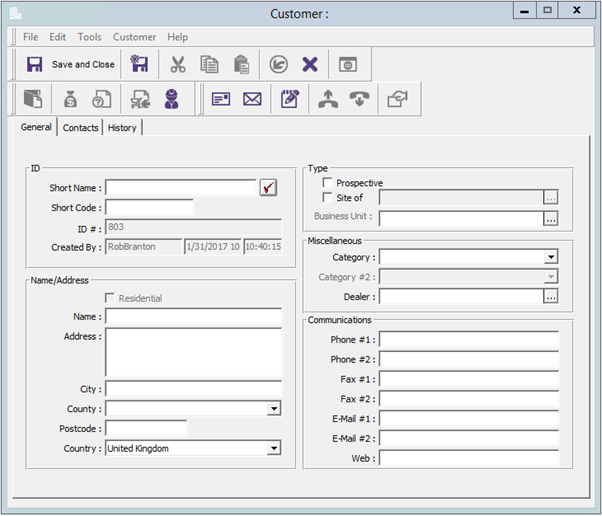
Once the Customer has been set up it is possible to Save and Close the record now, using the Save and Close icon at top left hand of the form.
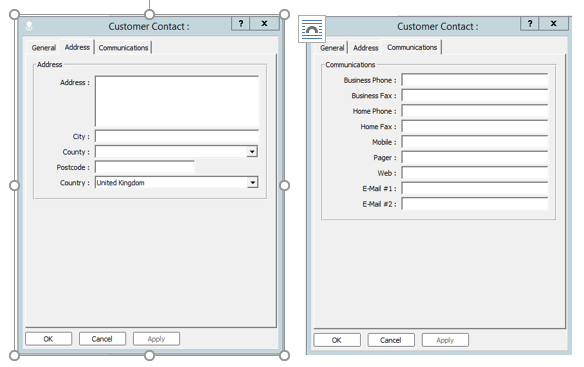
Alternatively, any Contacts or Departments at the customer can be added for use within the system. This is done form the Contacts TAB on the form which is used to add contact and department information.
It is also possible to enter some memorandum information regarding the customer on this TAB.
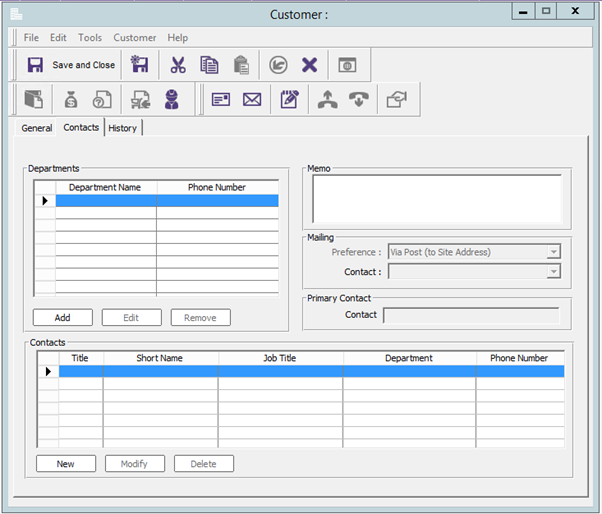
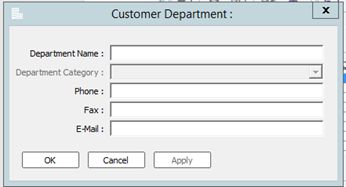
To Add a Department use the Add button in the Department frame , a simple dialogue box is opened to allow the information to be input. Once the information has been entered the OK button will save the details.
To Add a Contact use the New button in the Contacts frame , a Tabbed dialogue box is opened to allow the information to be input. Once the information has been entered the OK button will save the details.

FEA009 - Add notes to customer files.
Notes are added to Customers records by opening a Customer record and using the Notes icon, these notes can then be read using the History TAB on the Customers form.
Use the Note icon to open the Note form.
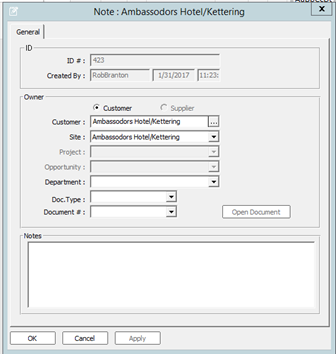
Enter the relevant Note information and use the OK button to save and close the Note form.
To display Customers Notes, from an open Customer record, go to the History TAB and select Note from the drop down list of options in the View frame titled Types. You will notice that there are many other History options that are available to see various information records relating to this customer.
If no information is displayed for the selected View Type, this is because there are other options available for selection. From the second drop down list, select All for this site. Once this is selected, any notes for the selection criteria are displayed in the view window.

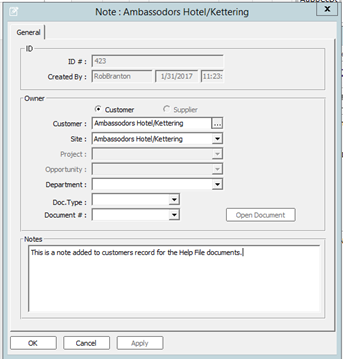
The individual Note record can be opened to see more information, for example who and when the note was created, or if it is linked to a Solarvista document etc. This is done by highlighting the relevant Note and using the Open button.
