Associated Feature(s):
- FEA024 - Capture labour times and add notes.
- FEA136 - Print documents/reports including editing of definitions/layouts.
FEA024 - Capture labour times and add notes.
This section will explain how to add a Labour activity and Note onto a job and then how to review Labour and other activities within a completed Work / Service Order.
The two icons below are located on any Job Form that is opened within X9 Manager application, the tooltip will display if the mouse pointer is hovered over these or any of the other icons within Solarvista.


The Labour icon opens the Labour form populated with some relevant details , for example the customer and site names and the Solarvista Document type and ID.

The Labour TAB is used to enter the Personnel who carried out the labour activity and the date/time the activity was carried out. The ‘Set’ buttons list often used values and can be selected from the drop down lists. Alternatively, it is possible to enter any value using the relevant windows control, i.e. windows calendar or time entry controls.
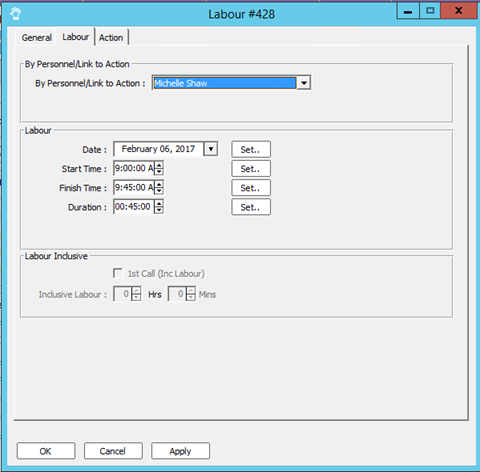
Only two of the three time fields need to be entered, the remaining one is calculated from the first two entries.
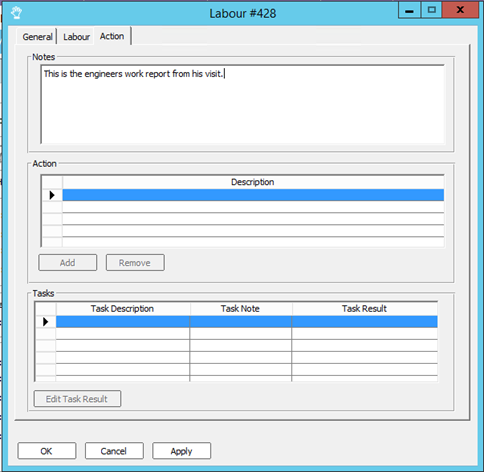
Once the Personnel, Date and time have been entered move onto the Action TAB to enter the engineers’ activity report.
The notes field is used to enter the engineers’ activity report on this visit. This should be as descriptive as possible.
Note. The Action and Tasks frames are disabled and not usable in the Solarvista Essentials edition of software.
Once the engineers’ activity report has been entered the form and data is saved using the Apply or OK buttons at the bottom of the form. The Cancel button will close the form without saving any of the details entered. You will note that this form does not include updating the job status and this has to be done manually on the Work / Service Order form, if the job is completed following this entry
Adding Notes to Work / Service Orders.
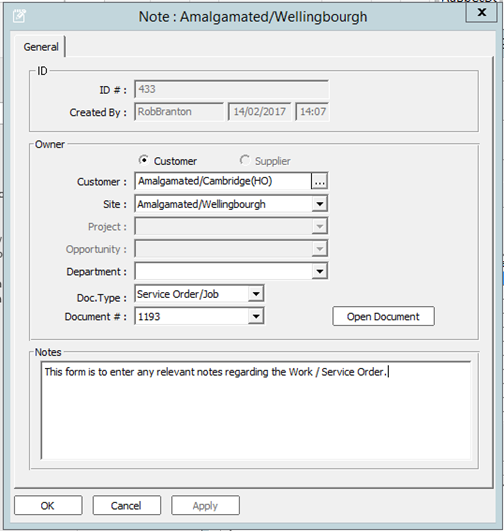
Notes are added to the Work / Service Order records by opening a Work / Service Order form and using the Notes icon, these notes can then be read or reviewed later using the Activity or History TABs on the Work / Service Order form.
Use the Note icon to open the Note form and enter the relevant Note information and use the OK button to save and close the Note form, see example below.
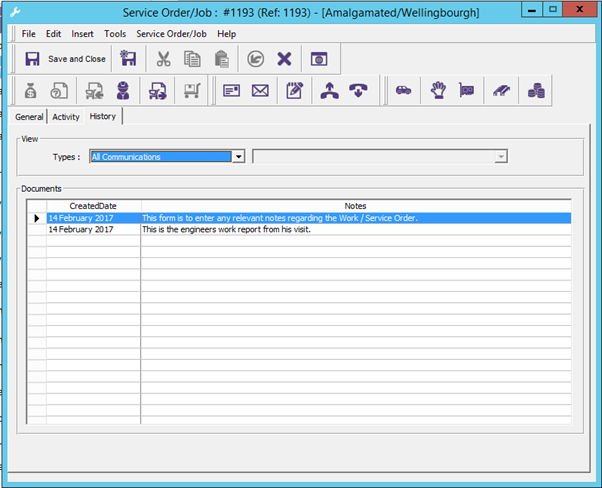
To display Labour and Notes, from an open Work / Service Order record, open the Work / Service Order form and go to the History TAB and select Labour/Note or All option from the drop down list of options in the View frame. You will notice that there are many other History options that are available to see various information records relating to this Work / Service Order.
To open one of these records, highlight the record you want to open and click the Modify button. This will open the relevant form and expose the details.
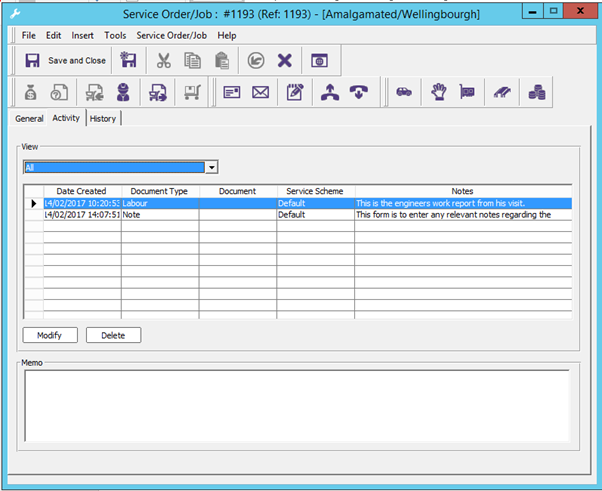
It is also possible to view and review activity records using the History TAB and selecting the relevant options form the drop down lists available, see Figure 6 below :-
In this instance it is possible to o[pen the relevant record by a double mouse click while the mouse pointer is hovered on the relevant record.
FEA136 - Print documents/reports including editing of definitions/layouts.
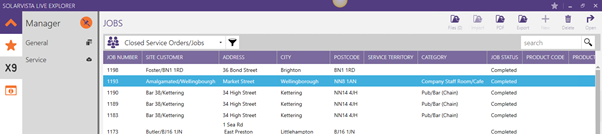
Once the Work / Service Order has been reviewed and all the details are correct, the default Job Summary report can be printed or exported. This is done by highlighting the relevant job on the Jobs closed view in Solarvista X9 Manager
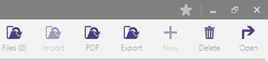
And then using the PDF icon in the top right hand corner of the Solarvista X9 Manager.
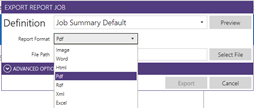
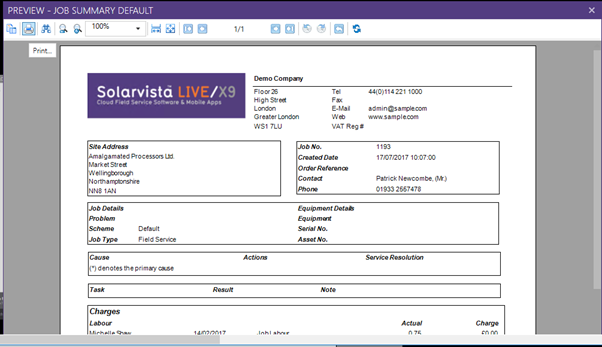
There is a Preview button in the top right hand corner, this is used to preview the Job Summary report before printing it
To Print the report there is a Print icon on the top left hand corner of the Preview Job Summary screen. This will call the windows account printing Option and allow selection of printer etc.
There are also several other file export options available (see Figure 9 above). To export the file to one of these formats, select the relevant format from the list of options. Use the Select File button to set where you want the file to be saved and the filename, then use the Save button to create the file and finally use the Export button to export the file. A message is displayed when the file export is complete. A Close button is then displayed and this will close the print feature and return you back to the Solarvista X9 Manager application.
Note. The Advanced Options is not available with the Solarvista X9 Essentials edition of software.