OB038 - Categorise time across all activities
Associated Feature(s)
- FEA028 - Categorise time across all activities.
Time Categories are used to differentiate non-working activities within Solarvista. They are typically created in the Solarvista Explorer application but are viewed graphically in the Planner. They are used to block out periods of time where the engineer(s) are not available for work, so that work activities are not planned during these periods. It is possible to enable the mobile application to allow engineers to record short breaks using Time Categories
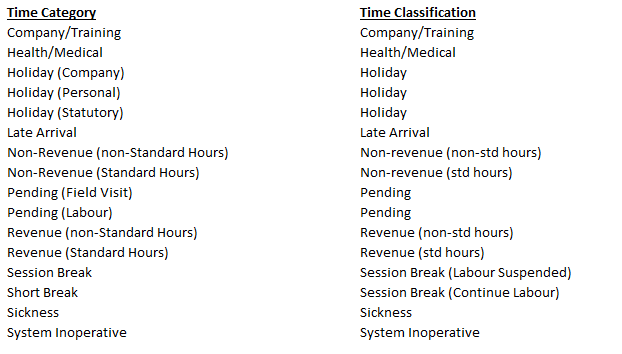
The Solarvista application comes with a series of pre-defined Time Categories and Time Classes shown in the diagram below, it is possible to add additional Time Categories if required.
Pre-defined Time Categories and Classifications:-
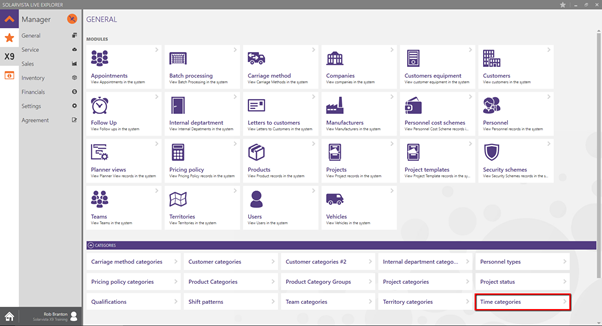
These can be seen using the General Taskbar, expand the Categories section and select the Time Categories Icon.
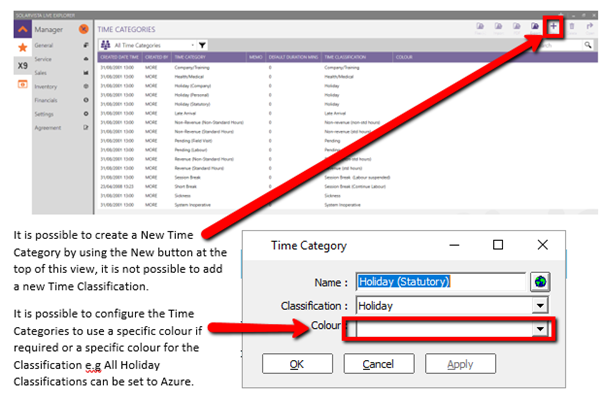
This will load the Time Categories view, note the colours are not configured as this column is empty.
Setting up Appointments using Time Categories
To create an appointment using a time category, go to the General Taskbar and select the Appointments Icon.
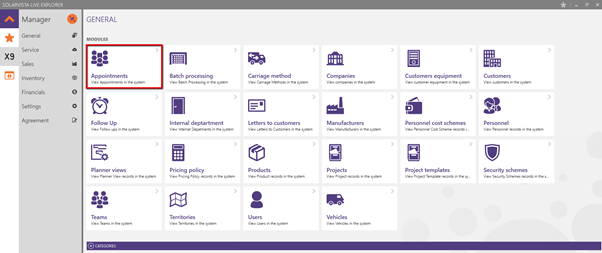
This open the Appointments view. To create a new Appointment, select the New button.

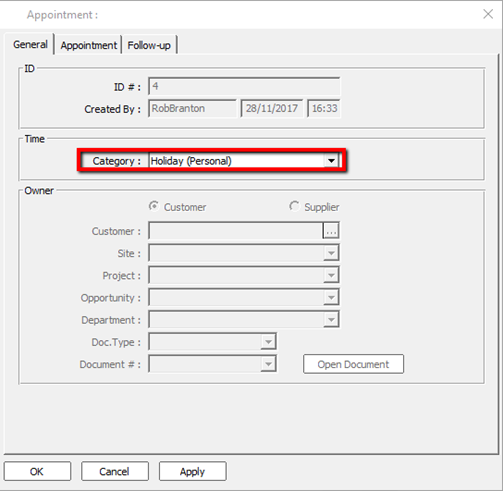
This will open the Appointment form,
Select the Category from the drop down list available, some record require a customer/supplier selection, the application will advise you if this is the case.
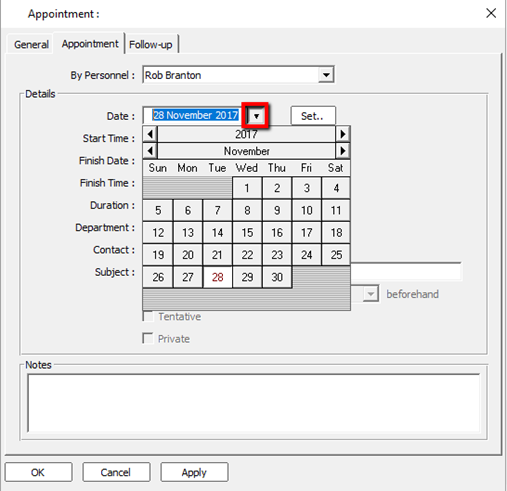
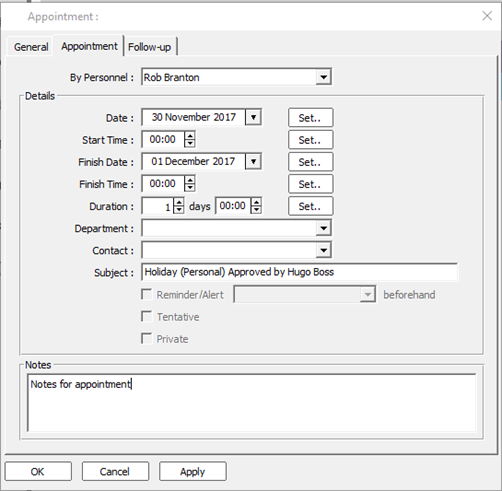
Go to the Appointment Tab, and select who the appointment is for (Personnel list).
Select the date & times of the appointment using the windows controls or Set buttons provided, these are shown in the two diagrams below. All methods should be investigated to decide on the best for the situations your business demands There is no further configuration options available for these controls.
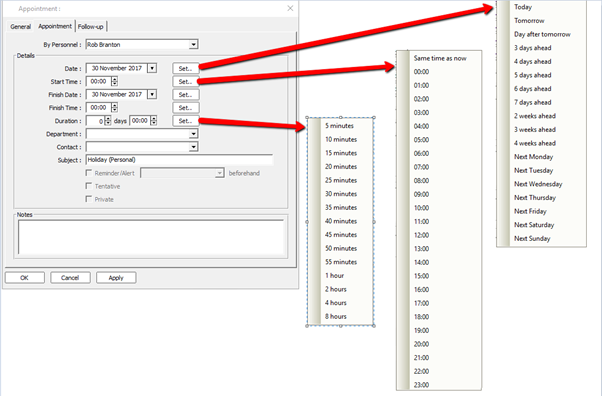
Once the date & times have been entered, it is possible to enter a Department and/or Contact if these exist in the system.
The Subject field is pre-populated from the Time Category selected on the General Tab, however, this can be added to if required by typing after the subject text. This text also appears in the Planner appointment graphic.
A note can also be added to the appointment if required. This does not appear in the Planner Appointment graphic.
Once the appointment details have been completed and saved, they can be viewed in the Planner application. Open the Planner, or refresh if the Planner is already open and navigate so the Personnel record is visible. There will be an appointment graphic for the appointment date/time used against this personnel record.

If the cursor is hovered on the appointment graphic and View Hover Details is enabled, a popup appears with the memo and additional information or the appointment.

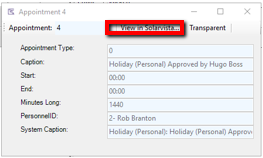
If a mouse right click is performed while the cursor is hovered on the appointment graphic, it is possible to open the appointment record in Solarvista Live Explorer or open an appointment summary popup.

Appointment Summary popup from the Planner, it is possible to open the appointment record is Solarvista Live Explorer from the popup by using the View in Solarvista button.
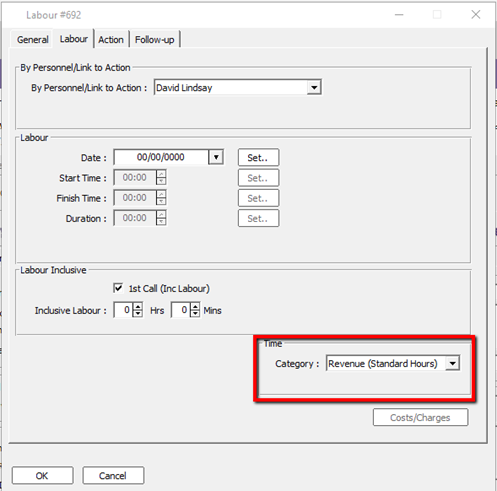
Time Categories used in Labour entry forms in Solarvista Live Explorer.
When entering Labour events in Solarvista Live Explorer it is possible to select if the labour event is Revenue (Standard Hours) or Non-Revenue (Standard Hours). By default these are available in the Solarvista forms below:-
- Telephone call – Outbound
- Telephone Call – Inbound
- Field Visit
- Labour
- Bench Work
The selection of the time category is done on the Labour Tab of the above forms. If there is a use for this time categorisation, additional Time Categories can be added using the Time Classifications of
Revenue (std hours) or Non-revenue (std hours).
The information entered into the above forms will be charged as per service scheme and the costs/charges for the Non-revenue items will need to be managed manually within Solarvista.
This feature is not available in the Solarvista Live mobile application.
