- FEA071 - Process requests from staff for parts/materials to be sent to them
- FEA072 - Register inventory via a goods inwards process linked to purchase order
- FEA073 - Move inventory at any time from one location to another
- FEA074 - Fulfill sales orders with inventory using a sales dispatch note [requires Sales option to operate]
This article explains how to process Inventory Requests which are normally raised on mobile application (see Features 169/170). It is also possible to raise inventory requests in the Solarvista Explorer application by anyone of the following methods within an open Service Order Job record, this way automatically links the inventory request to the Service Order Job document (for traceability)
- File > New for this Service Order/Job >Inventory Request
- Click the Requisition Icon (Shopping trolley)

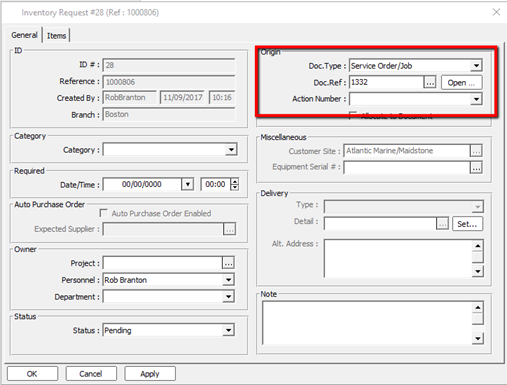
It is also possible to raise the inventory request using the Inventory Request icon on the Inventory taskbar Request and click the New icon to open the empty record, it is possible to link the inventory request to the service order job record manually using fields in the Origin frame on the empty form.
The inventory request form has 2 tabs one for the header information and another to list the inventory items requested.
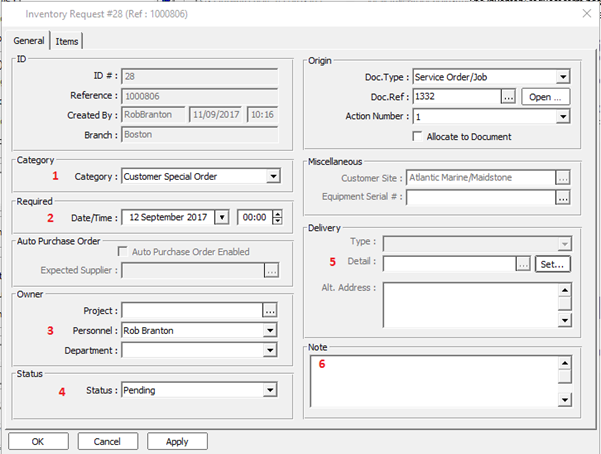
Inventory request information, the following data is usually necessary for the inventory request :-
1 The category (set up in Inventory > Categories >Inventory Request Categories form).
2 Date and time items required for.
3 Personnel is set automatically by system from who created the record but can be changed. The document can be linked to a project or department in this frame.
4 Status (Default set in General >Companies > Inventory Tab) additional status can be added in Inventory > Categories >Inventory Request Status form.
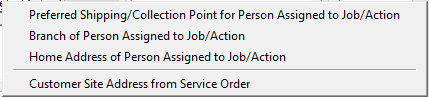
5 Delivery details can be set using the Set button and select from the list.
6 Notes can be added to the inventory request as additional useful information.
Note. Auto purchase order is specialised functionality not currently available, (please contact Solarvista account manager for further details).
The Items Tab will initially be empty and click on the New button will open an item search form to allow the items to be identified and added onto the inventory request.
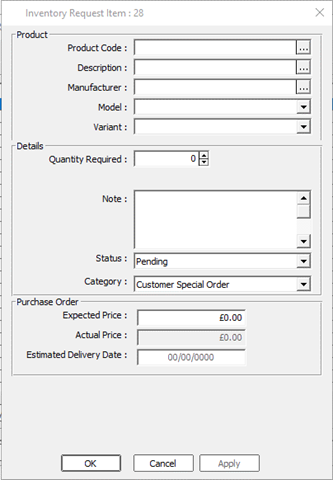
It is possible to search for a product using Product code, Description, or Manufacturer followed by Model and Variant.
Enter quantity required.
Add note for this item if necessary.
Status and Category will default from the header.
Expected price is entered from the product record automatically.
Click OK when this item complete and add further items as required.
Once all the items have been added the inventory request can be saved by clicking OK at the bottom of the items Tab.
Registering items using Goods Inwards.
The main method of adding stock into Solarvista will be via the Purchase Orders process see Feature 083. The actual transaction to receipt stock into Solarvista is the Goods Inwards process which is the successive process to raising a Purchase Order.
The goods inwards form includes the supplier and purchase orders references from the source purchase order record, any other Solarvista document links are shown in the Allocate to Document frame. Items are also imported into the Items Tab (covered later in article).
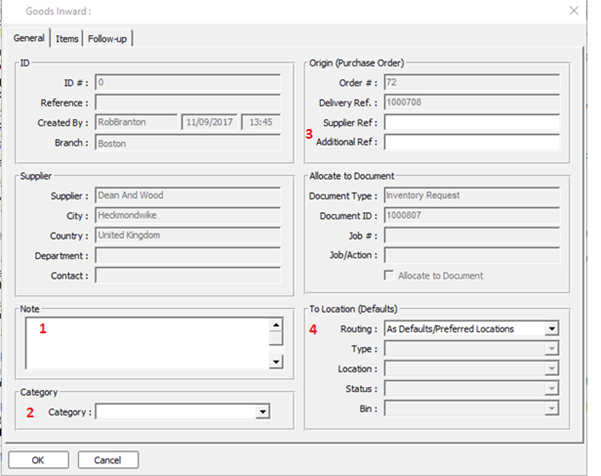
Additional fields are available on the goods inwards form for the following information :-
1 A note field is provided to add additional information if necessary, this is not copied form the PO.
2 The Category can be selected from the drop down list, it is not possible to add extra Goods Inwards Categories these are linked to Suppliers Categories for primary/secondary sourcing information.
3 There are 2 fields to record the Supplier Ref (usually delivery note id) and any Additional Ref information for audit and traceability of documentation.
4 By default the To Location details are set As Defaults/Preferred Locations, these can be changed using the controls provided. Any changes here will be applied to all items on the goods inwards transaction.
The Items Tab is used to check against the delivered items and quantity delivered so partial delivery can be accommodated.
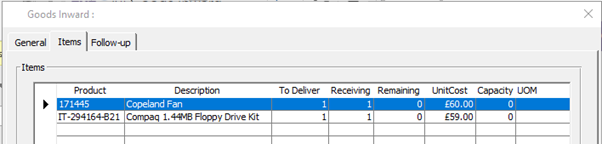
It is possible to use the Edit button on the above form to set the To item location and quantity delivered if different to that ordered.
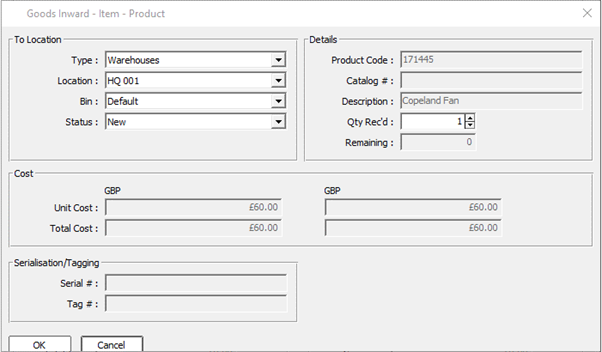
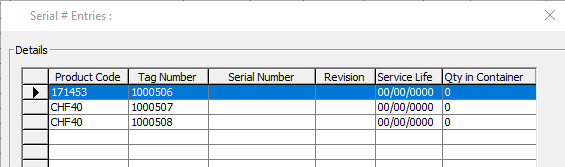
Once all the lines items have been checked and locations and/or quantities changed the goods inwards transaction can be processed. Click OK on the bottom of the Items form and confirm you want to process the form, If relevant a form will pop up for you to record Serial numbers, Service Life and container quantities (specialist functionality).
Once the above information has been added the form is saved, the inventory locations are updated and the PO and PO line statuses are set accordingly. The goods inward form is removed from the view because it has been processed, however the record is available as a Purchase Order Advice record for audit and traceability.
Inventory movements
These transactions are used to fulfil inventory requests and also used to manage stock within Solarvista i.e. stock moves between locations and/or warehouses etc.
New and existing inventory movement records and new ones are created from the one view on the Inventory Taskbar.
On opening a new transaction, it should become apparent that from and to locations are required and an Items Tab to list the products on this goods movement note.
All the information can be input manually but system assistance is provided in some areas explained below.
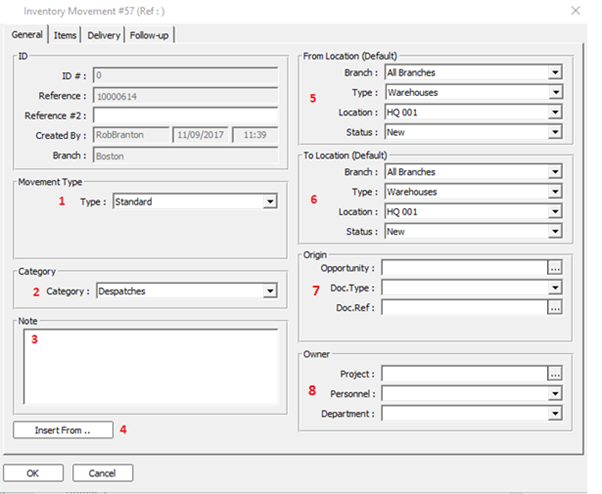
Goods Movement information, the following data is usually necessary for the goods movement :-
1 Movement type, these are set up in the database supplied, additional ones may be available and can be used to default the from/to location type details and also invoke an ‘In Transit’ temporary location.
2 The category (set up in Inventory > Categories > Inventory Movement Notes Categories form).
3 Notes can be added to the goods movement note as additional useful information.
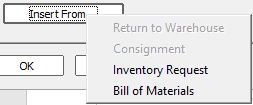
4 The Insert From button, lists the form options to import items from into the goods movement automatically. Clicking one of the options opens a form selection dialogue to find and select the form to import items from.
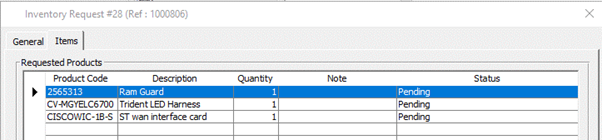
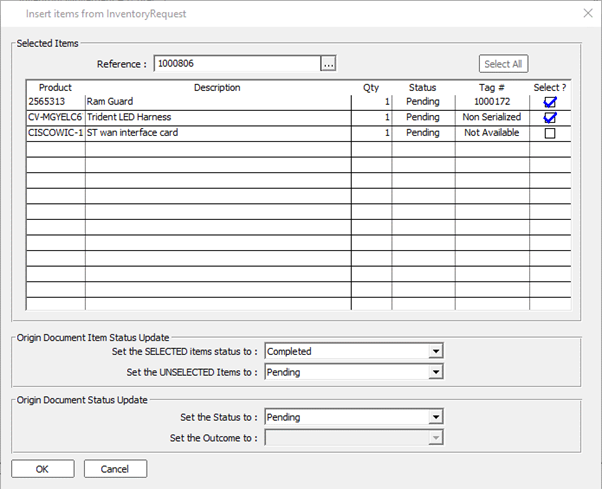
The example below uses Insert From inventory request no 1000806, the import checks if there is inventory available to meet the request and makes this visible in the Items form. The top two items are available the bottom one is not. It is possible to send these two items and then create another goods movement when the other item is available. During processing the items, it is possible to update the Items and /or source document statuses using the bottom section of this form, this removes the need to do this manually. Click OK and confirm the processing of the transaction.
5 The From location details can be selected from the drop down lists available (from location type can be set from Movement type if required).
6 The To location details can be selected from the drop down lists available (to location type can be set from Movement type if required).
7 The goods movement can be linked to another Solarvista form in this frame, but if the Insert From feature has been used this will link automatically.
8 It is possible to set the Owner of the goods movement if this information is necessary for audit or other purposes.
If the goods movement is saved at this point the stock is immediately moved from the, From location to the To location, and is available for use. However, in reality, this could take some time to transport the item between the locations, this is where ‘In Transit’ is an option.
If ‘In Transit’ use is enabled, this requires personnel to have Collection points assigned to them in order for it to work. Using the Delivery Tab on the goods movement form, it is possible to enter a Carrier, method and note if necessary, the ‘In Transit’ box is checked and the relevant Collection Point is assigned from the list. This list will only show those collection points allocated the personnel in the To Location area on the General Tab. Click OK on the form to save the record.
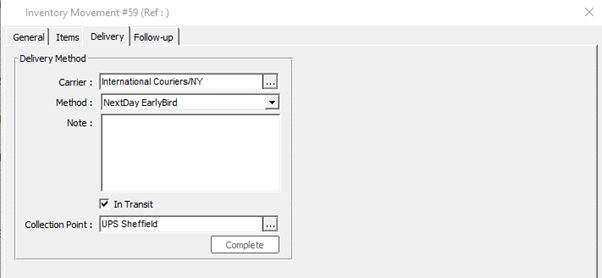
This ‘In Transit state is logged on the product record and the inventory location views.
The ‘In Transit’ transaction currently, has to completed manually in Solarvista Explorer by clicking the Complete button on the Goods inwards delivery Tab which should now be enabled. The stock is then move to the target location and is available for use.
Sales Order Despatch
This process requires the Sales option to be enabled and details the sourcing of items sold on sales orders only (see Feature 130). This process in more commonly known as Goods Outward and its view is opened from the Inventory taskbar.
The goods outward form holds details of the relevant sales order, the default location, and sales order values. The sales order items are also shown on the Items Tab (covered later in article).
Additional fields are available on the goods outward form for the following information :-
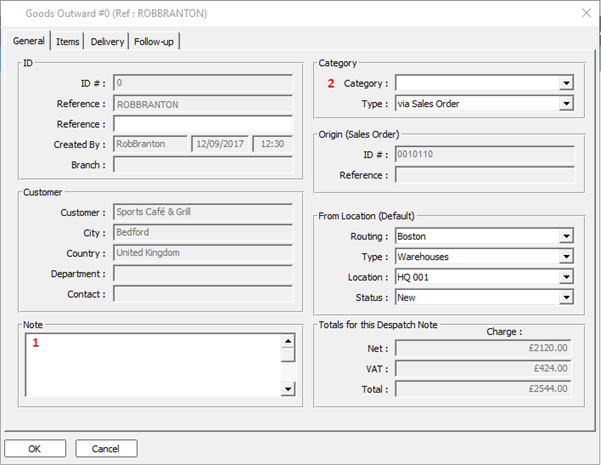
- Notes added for further information if relevant.
- Select the Primary/Secondary source (it is not possible to add extra goods outwards categories)
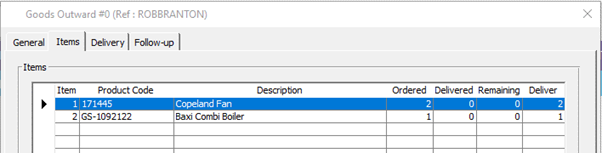
The Items Tab lists the items sold within the sales order.
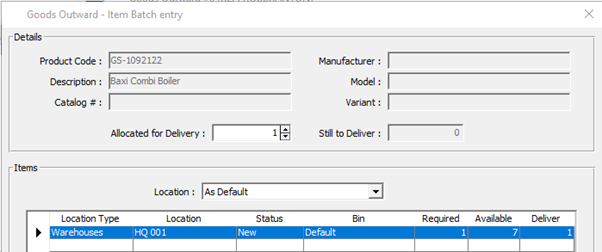
By clicking on the Edit button at the bottom of this form, a pop up will show you where the highlighted items are located in the Default location. For serialised items the form selects earliest Tag numbers for despatch. This can be overridden by selecting the serial/Tag numbers being sent out. For non-serialised items just the locations and quantities are shown.
Serialised
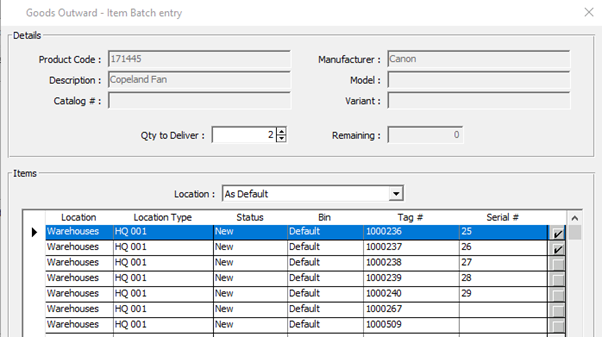
Non-serialised
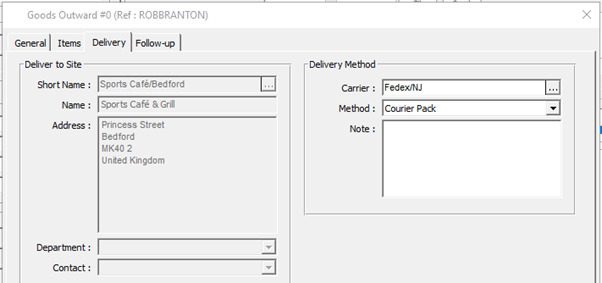
There is also a Delivery Tab to define the delivery options where necessary.
Once all the details have been entered Click OK to process the goods outward and confirmation is required to proceed.
The goods outward record is updated and the stock is adjusted accordingly. The goods outward is removed from the view because it has been processed but the record can be viewed using the Sales Dispatch Notes view.