![]()
The “Equipment” record holds information about the physical assets that you may wish to either hold on file or provide services upon.
Some features are dependent upon your select plan for your account.
Indicates a feature is only available in Standard or above.
Indicates a feature is only available in Enterprise.
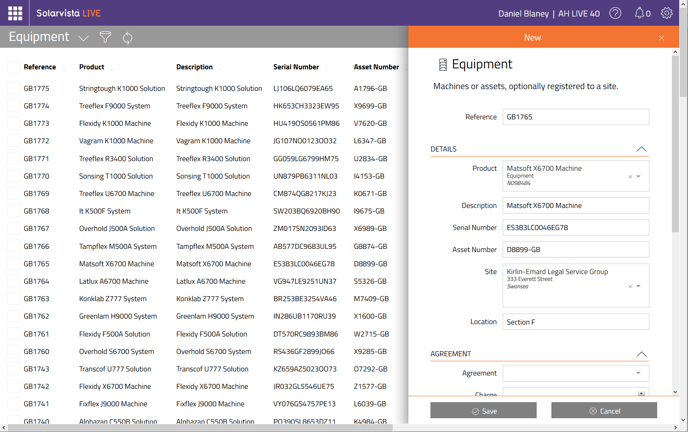
The “Equipment” record holds information about the physical assets that you may wish to either hold on file or provide services upon.
The record can be referenced during the Job creation process to determine entitlement to prescribed service levels. It can also be used with the recurring work generation processes to generate Jobs/Work Items for “Equipment”.
All Equipment records can have an optional reference to a Product, but they can also be free text only (“Description” field).
Equipment can also have an optional Site record related to it, or you can use a simple text field, “Location”.
Equipment can also be assigned to an Agreement ![]() with an associated Charge
with an associated Charge ![]() that is optionally summed to create an overall Agreement charge that’s automatically calculated (this is a setting on the Agreement itself).
that is optionally summed to create an overall Agreement charge that’s automatically calculated (this is a setting on the Agreement itself).
If you wish to determine a “Service Level” i.e. how quickly you will respond to requests for services on an item of Equipment, you can populate the Service Level ![]() field.
field.
Where Equipment Records are Used
The following files refer to Equipment records so if you plan to use any of these, setting up the records in this file will be important or even critical:
Work Items:
- Generic Job
- Field Repair
- Internal Repair
- Field Maintenance
- Internal Maintenance
- Help Desk Call
Data Sources:
- Recurring Work

Activity/Forms
- Equipment Collect
- Equipment Return
Pre-requisite Files for Equipment
When setting up Equipment records, it is recommended to review the other data files that may need to be referred to by each record. These are the files that you may need to setup in advance:
- Products
- Sites
- Categories (Equipment)
- Service Levels
- Agreements
Field Descriptions for Equipment
The ID section holds the unique ID for the record:
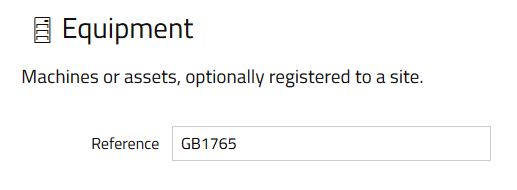
Reference - holds the unique ID for the record (most records in Solarvista have one of these). It cannot contain any spaces or non-standard characters. Once the record is saved, it is not possible to edit it afterwards. In most default situations, the Reference is automatically set using a counter sequence, however, you can setup your own if you prefer.
The Details section holds the detail about the type of equipment and its location:

Product –the equivalent Product that is the Equipment; if this doesn’t exist, you can overwrite with free text, however this is not recommended as other features degrade without this information.
Description – copied from the Product’s Description if above is selected or you can type in a single line description of the equipment.
Serial Number – unique serial number of the equipment.
Asset Ref – an alternative ID, tag number or serial number for the equipment.
Site – optional Site where equipment is located.
Location – optional free text location description.
The Agreement ![]() section holds information about any related Agreement to the equipment:
section holds information about any related Agreement to the equipment:
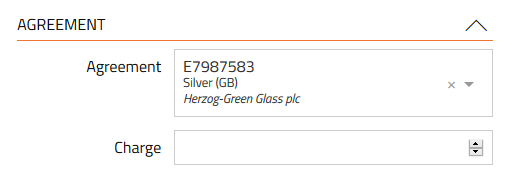
Agreement ![]() – this allows optional selection of an Agreement that applies to the Equipment. When creating a Job (Work Item) which refers to Equipment, if this field is populated, Solarvista will update the Service Level and Pricing Policy to be the same as the Agreement’s (unless the Service Level is defined on this record).
– this allows optional selection of an Agreement that applies to the Equipment. When creating a Job (Work Item) which refers to Equipment, if this field is populated, Solarvista will update the Service Level and Pricing Policy to be the same as the Agreement’s (unless the Service Level is defined on this record).
Charge ![]() – this holds the optional specific charge for this Equipment and is used where Agreements are automatically computed to be the “sum of” the individual charges.
– this holds the optional specific charge for this Equipment and is used where Agreements are automatically computed to be the “sum of” the individual charges.
The Service Level ![]() section holds details about level of service provided:
section holds details about level of service provided:
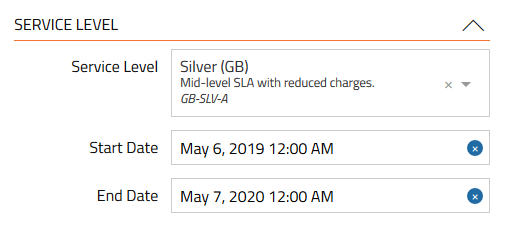
Service Level ![]() – the definition of the Service Level is optionally entered here IF it is different from the Agreement’s service level. If both Service Levels (on Agreement and here) are left empty, the default Service Level from the Site and/or Customer records are used.
– the definition of the Service Level is optionally entered here IF it is different from the Agreement’s service level. If both Service Levels (on Agreement and here) are left empty, the default Service Level from the Site and/or Customer records are used.
Start Date ![]() – if different from the Agreement, or if no Agreement is set, this is a specific date to apply the Service Level from. If left empty, validity is assumed, subject to the End Date field.
– if different from the Agreement, or if no Agreement is set, this is a specific date to apply the Service Level from. If left empty, validity is assumed, subject to the End Date field.
End Date ![]() – if different from the Agreement, or if no Agreement is set, this is a specific date to apply the end of Service Level from. If left empty, validity is assumed, subject to the Start Date field.
– if different from the Agreement, or if no Agreement is set, this is a specific date to apply the end of Service Level from. If left empty, validity is assumed, subject to the Start Date field.
The Other section holds miscellaneous additional information:
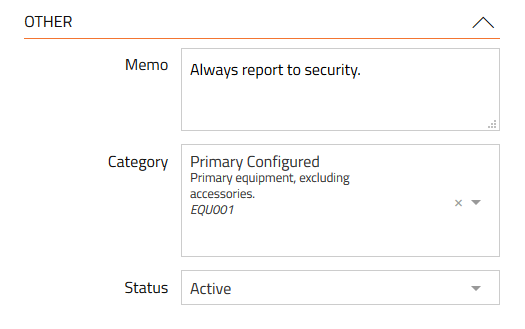
Memo – a free text field that can be used for any purpose.
Category – a category of Equipment selected from the options in Categories where Type = “Equipment”.
Status – defines the status of the Equipment as follows:
- Draft – the equipment record is being setup and is not available for selection yet elsewhere in LIVE.
- Active – the equipment record is active and is available for selection within Solarvista.
- Collected – the equipment has been collected and is being worked upon.
- Cancelled – the equipment no longer exists or is invalid.
Creating a New Equipment Record
To create a new Equipment record:
- Click on the “Plus” button.

A menu will appear. - Within the “Data Sources” section, find “Equipment”.
- Click on “Equipment”.
- A new “empty” Equipment record will appear.
- Populate all fields as you require.
- Click on the “Create” button.

- You may need to refresh the page to see the new record in a view.

Editing an Equipment Record
To edit an Equipment record:
- From the main menu, select Equipment.

The default view for Equipment will open. - Click on the Quick Filter button.

- Enter criteria for the Supplier record you are looking for and click Apply button.

- The view will update. Find the record you are wanting to edit.
- Click anywhere on the row that shows the record. The record will open.
- You can edit any field that allows editing (some could be set to read only).
- Click on “Save” button to save changes.
Deleting an Equipment Record
To delete an Equipment record.
- From the main menu, select Equipment. The default view for Equipment will open.
- Click on the Quick Filter button.
- Enter criteria for the Product record you are looking for and click Apply button.
- The view will update. Find the record you are wanting to delete.
- On the left side of the view is a column containing checkboxes.
- Check the box of the record you want to delete.
- Click the “Delete” button on the top right.

A slide in dialog will appear prompting you to confirm the delete, by typing in the word “DELETE” again. - To confirm, click the “Delete” button and the record (or records will be deleted).
Note: You cannot delete a Equipment record that is already in use with a Work Item i.e. Jobs. You can delete Equipment records referred to only by other Data Sources however this will leave those records without an associated to a valid Equipment record. If this happens by accident, you can manually recreate the record ensuring the Reference is identical. You can also change the status of the record to prevent it appearing on screen in future whilst maintaining historical integrity.
Customising or Adding New Fields
Solarvista™ is built upon a uniquely flexible platform that allows you to edit fields (or remove them in some cases) as well as add your own fields. These new fields (or edited characteristics of existing fields) automatically become available within the web portal and the mobile apps. For more information, refer to the Customising section.
Importing Equipment Data in Bulk using Import Tool
If you have a lot of Equipment information to enter, you may prefer to upload this using the Import Tool that’s built into Solarvista. The Import Tool enables Equipment records to be created from “CSV” text files. CSV files can be created from a wide range of popular applications including Microsoft Excel. For more information on importing data into Solarvista, please refer to the article here.